Know where the money goes — every expense, itemized
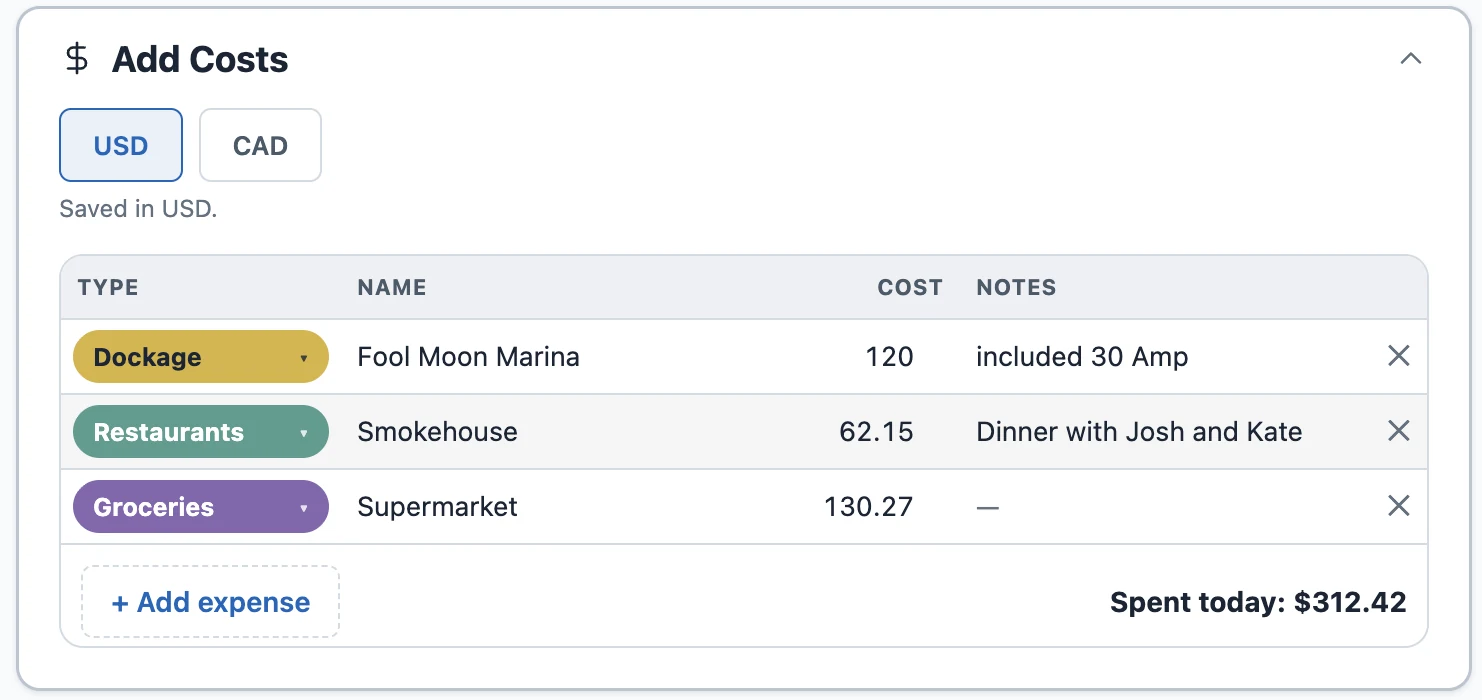
Each day used to give you a handful of fixed cost boxes. Now you log every expense as its own line — type, place, and amount — so groceries stay separate from restaurants and the fuel dock gets logged by the gallon or the litre.
Why we changed it
The old cost boxes were quick but blunt — "Food" lumped groceries, restaurants, and that $6 ice cream into one number, with nowhere to note the marina or what fuel really cost. So we turned the day's costs into a real ledger: as many lines as you want, each with a type, a name, and an amount.
Add a line for whatever you spent
Open a day, tap Add Costs, and add a line: pick a Type, name it in the "where / what" field, and enter the amount — then + Add expense for the next. Add your own types if the defaults don't fit, and an empty day suggests the types you've used most on this trip.
Buy fuel by the gallon or the litre
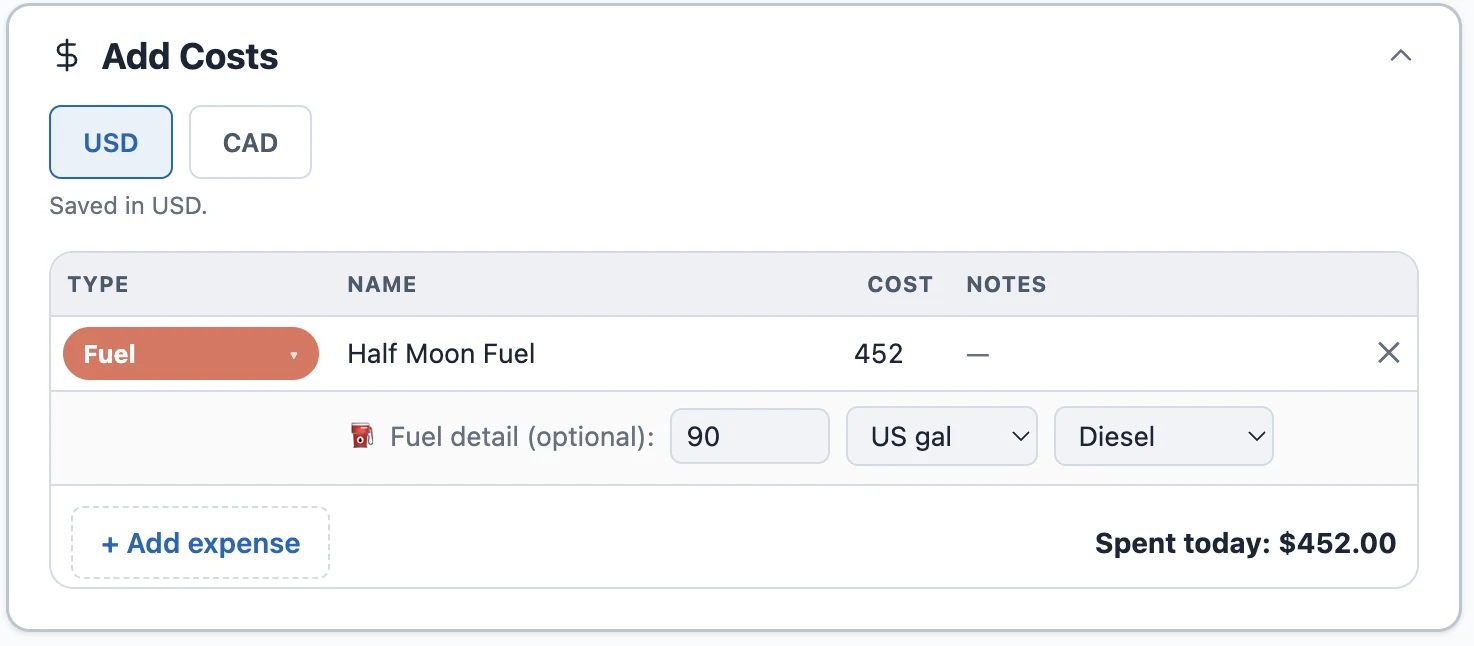
Fuel gets a little extra: log what the fill cost, then — optionally — the quantity, with a US gal / litres switch on the row. Litres in Ontario, gallons in Florida; it still totals cleanly and works out your price per gallon.
Spend in Canada, see it in your own currency
Crossing into Canada or the Bahamas? Tap CAD, enter the amount off the receipt, and Loop Captain saves it in your home currency — so every total stays in the money you think in.
Find it under My Trip → Timeline
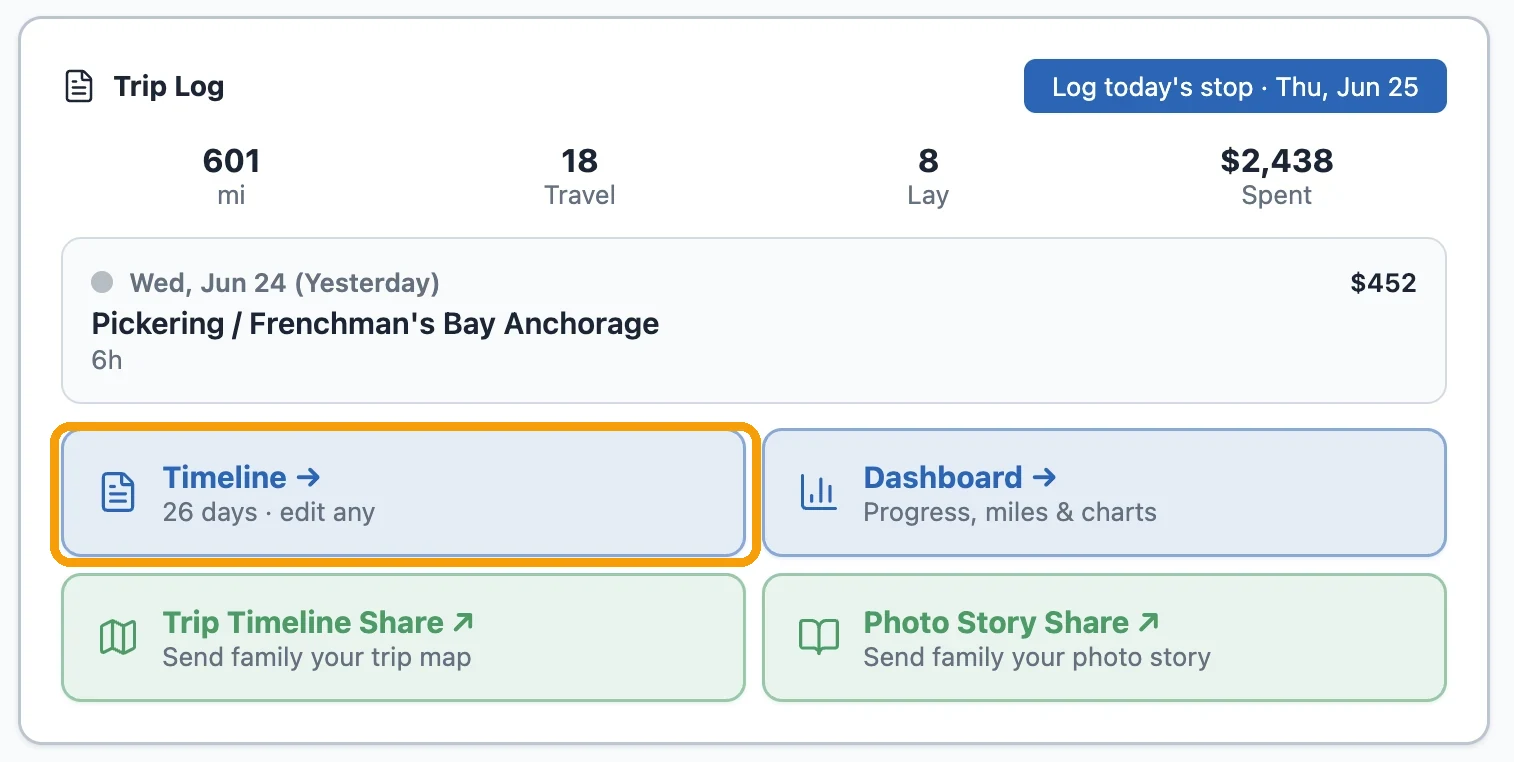
Your costs live with your days. Tap My Trip, then the Timeline card, to open the day-by-day list — add or edit any day's costs there.
Take the whole thing as a spreadsheet
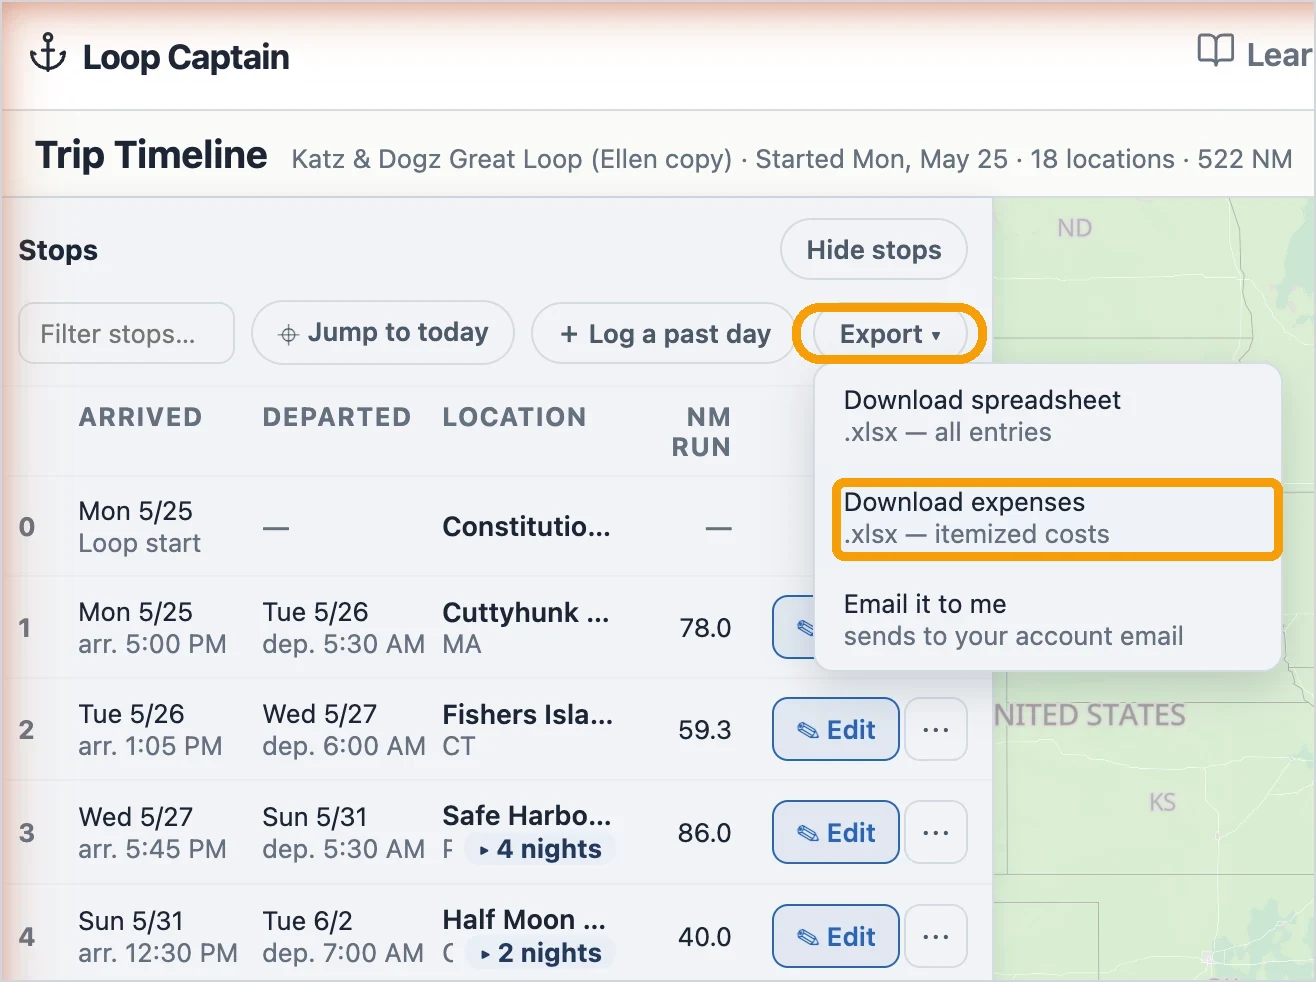
On the timeline, tap Export → Download expenses for the itemized ledger as an .xlsx (or Download spreadsheet for the day-by-day view). Both come in your home currency.